
Imagine you have hundreds of static pages and hundreds of product pages, and a comprehensive system that can change things on any of them at any moment. This system involves software components, such as data integration or data cleanup modules, and people, such as administrators or developers. Some of the actions generated by them are trackable, but not all. Even if the actions are trackable, it is not easy to distinguish which changes affected the storefront and which did not.
I faced this problem last year. We were preparing the system for launch, and we needed to know about all processes in the system, especially those that affected the storefront, and especially if these processes led to removing or changing things there.
Before and after another deployment, some pages and components are not expected to change, but things happen, and we need to be prepared and become aware of any breakage as early as possible.
This situation was compounded by the fact that we had a distributed network of content administrators who were taking their first steps in content management. With such a setup, we were facing content issues that required significant effort to find a root cause. The lack of SAP hybris auditing capabilities — who did what and when — added a decent level of complexity.
To keep control over the changes, I created a quick solution to monitor them. My script created a set of screenshots and compared them with the previous set. The report showed the differences. With these reports, we were able to detect unexpected changes in the website content. It also helped us detect bugs in the code.
Architecture

There are three steps:
- Creating screenshots (image files)
- Includes SSO authentication
- Supports batch mode
- Comparing with the previous state
- Supports fuzziness to turn a blind eye to rendering-related differences
- Creating a report
- Major differences are clearly visible
- Minor differences can be filtered out
There is a regular cron job performing these steps sequentially every morning or by request.
The list of pages for screenshotting consists of two sets:
- WCMS pages
- Public pages
- Restricted access pages
- Component pages
- Per type: a page per component type. Each page contains all component instances of the component type.
- Per component: a page per component instance. Each page contains only one component instance.
All pages might be rendered differently for different:
- Current language (session)
- Current country (session)
- Current user (session)
Creating Screenshots
I used Selenium Server 3.7 + Chromedriver + Python 3 + Selenium for Python for this purpose.
pip3 install seleniumpip3 install pyvirtualdisplaybrew install chromedriver(for MacOS)
To check that everything works well, try this script:
from pyvirtualdisplay import Display
from selenium import webdriver
from selenium.webdriver.common.keys import Keys
from selenium.webdriver.support.ui import WebDriverWait

display = Display(visible=0, size=(1700, 800))
display.start()

driver = webdriver.Chrome(service_args=["--verbose --log-path=chrome.log"])
driver.set_window_size(1700, 800)
driver.get("http://www.python.org")

assert "Python" in driver.title

elem = driver.find_element_by_name("q")
elem.clear()
elem.send_keys("pycon")
elem.send_keys(Keys.RETURN)

assert "No results found." not in driver.page_source

driver.close()
display.stop()
Navigating and loading the page for screenshotting
To load a page, you need to use syntax like the following:
driver.get("http://www.python.org")My script iterates over the pages and loads them one by one in the virtual browser, supported by chromedriver.
Authentication. More than half of the pages to test required authentication. The website I was working on was integrated with OKTA as an SSO provider. The script submits a form to get access to these pages.
Responsive. The website supports responsive mode, which means that different devices and resolutions are supposed to be processed differently, a special set of templates will be used, etc. So there was a separate run of the process with mobile mode on.
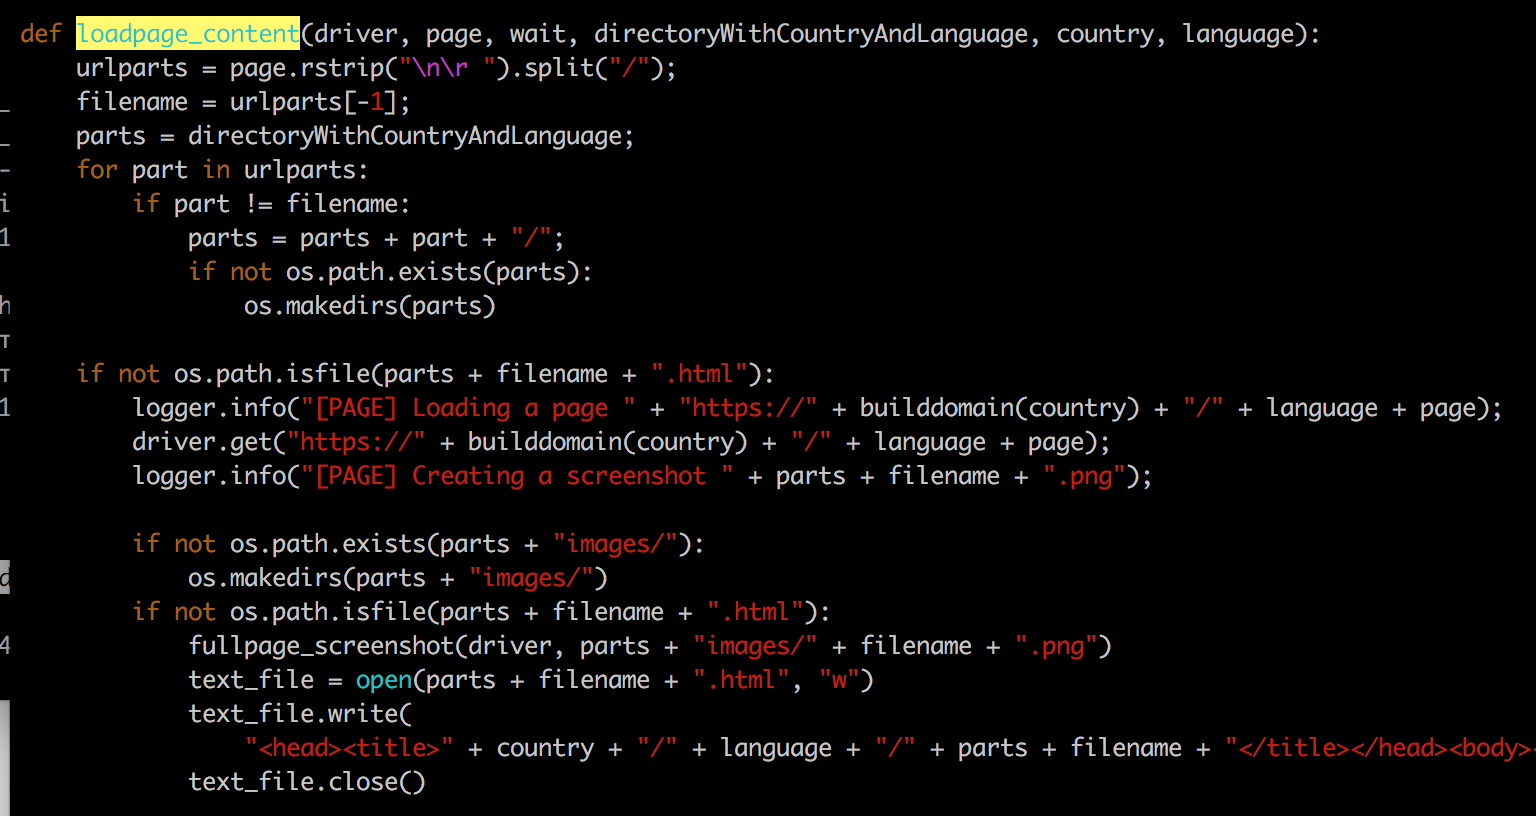
The following code loads the pages and launches the screenshotter. The results are placed into the HTML files and image folder. The URL depends on the country and language, which is why these components are part of the equation.
Creating a screenshot
The script creates the image files, or screenshots, in the folder with a name unique to the process.
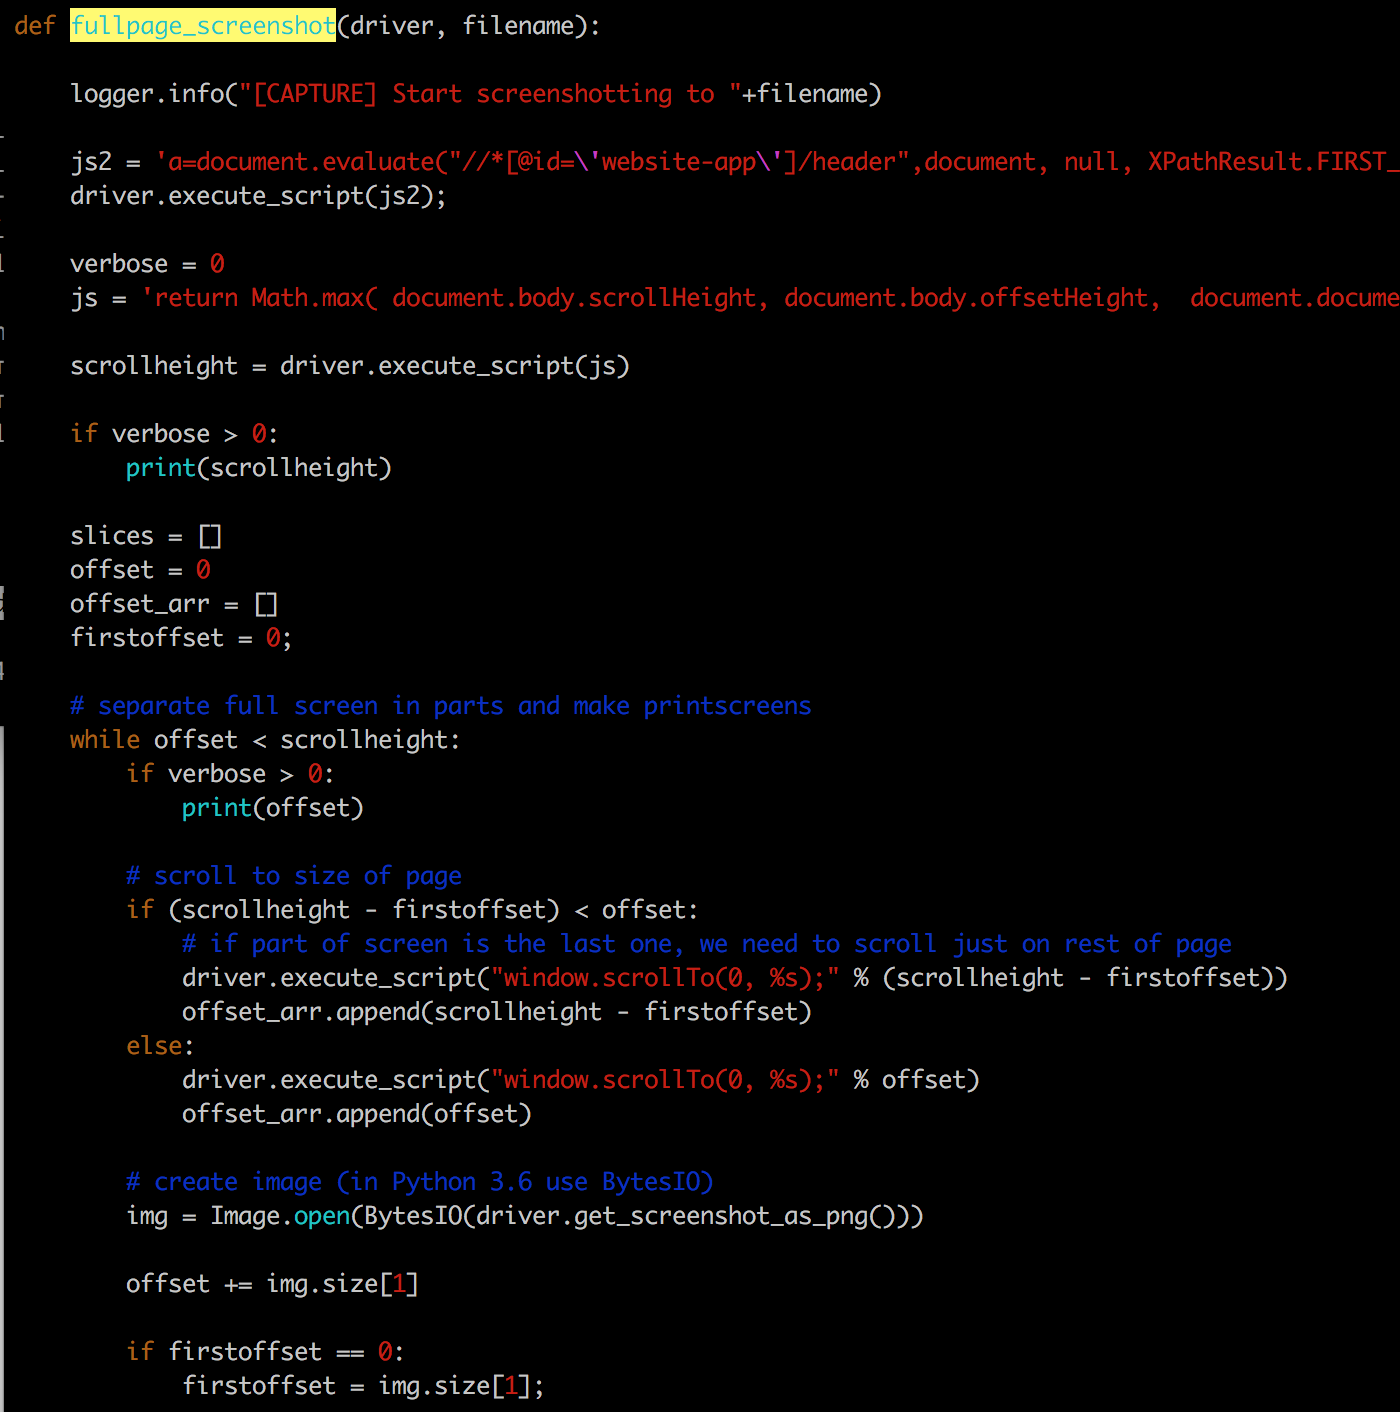
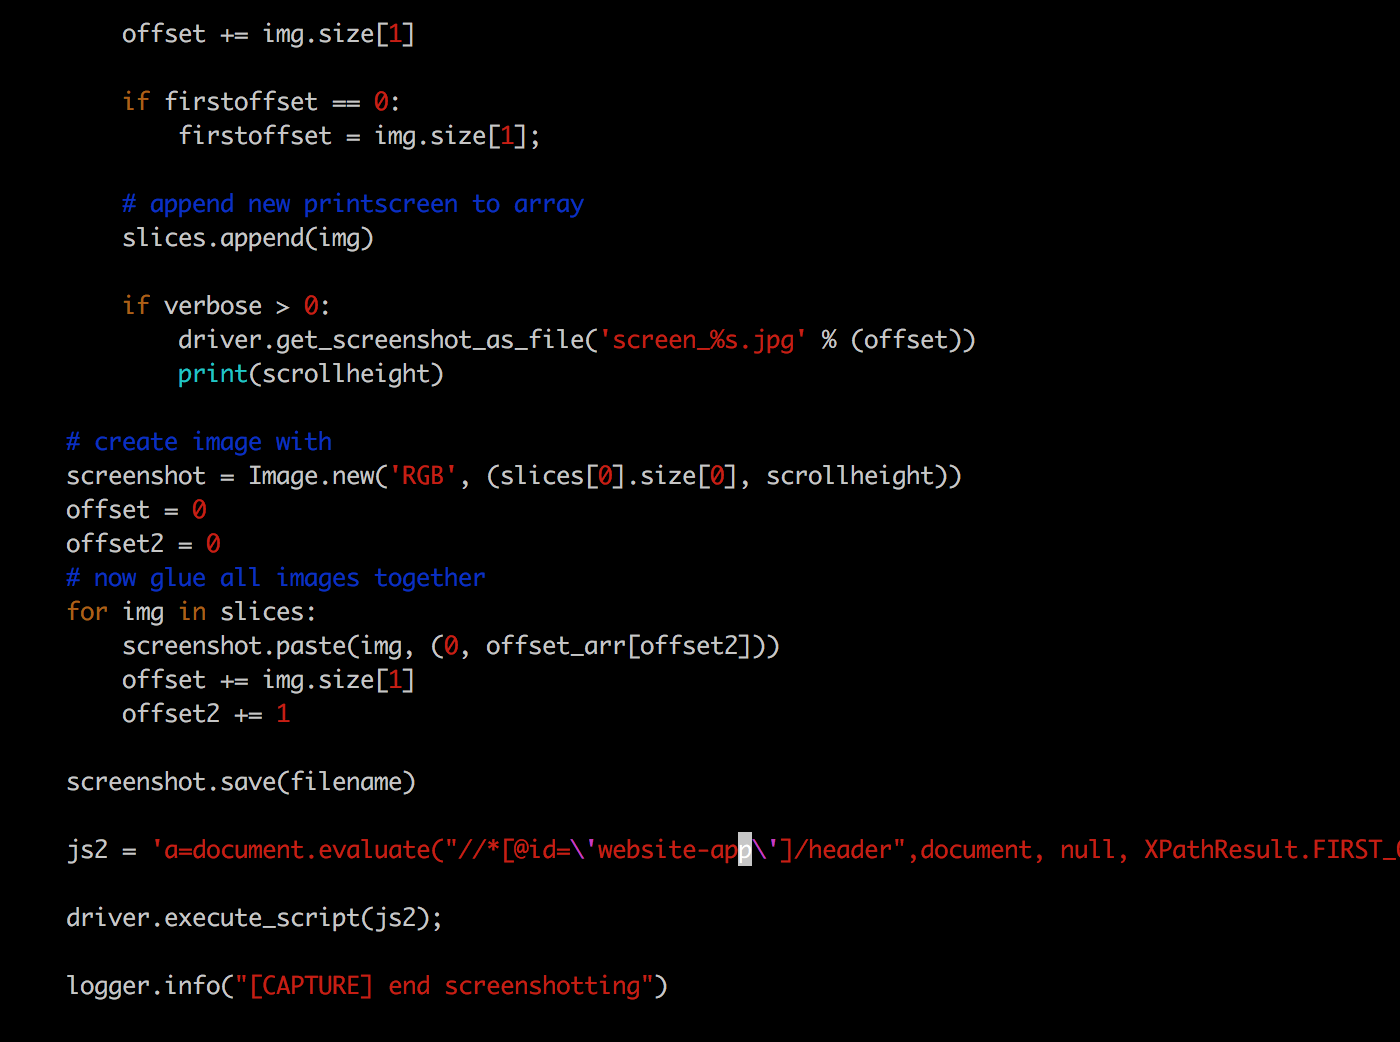
driver.execute_script is used to execute JavaScript code in the browser. It helped me hide some blocks before taking a screenshot. The website uses a menu fixed to the top when scrolled. Without hiding it, the menu would be repeated in the screenshot as many times as the number of screens in it.
SAP hybris Components page
Creating full-page screenshots is not a solution if they contain many dynamic blocks: your screenshots will be too different from each other to detect changes reliably. The solution is to track changes in page fragments — WCMS components.
However, hybris OOTB does not provide a way to render a component separately from the page it is contained in. There is a customization: the page controller, which renders the components taken from a URL parameter.
@RequestMapping(value = "/_wcmscomponents")
public class GetAllComponentsController extends AbstractPageController
{
    @Autowired
    private ModelService modelService;

    @Autowired
    private TypeService typeService;

    @Autowired
    private CMSComponentService cmsComponentService;

    private Set showAllComponents(final Collection allPages,
                                  final Predicate filter)
    {
        return allPages.stream()
                .map(AbstractPageModel::getContentSlots)
                .flatMap(Collection::stream)
                .map(ContentSlotForPageModel::getContentSlot)
                .map(ContentSlotModel::getCmsComponents)
                .flatMap(Collection::stream)
                .filter(SimpleCMSComponentModel.class::isInstance)
                .filter(filter)
                .collect(Collectors.toSet());
    }

    @RequestMapping(value = "/{uid}", method = RequestMethod.GET)
    public String getByUid(final Model model, @PathVariable("uid") final String uid) throws CMSItemNotFoundException
    {
        final SimpleCMSComponentModel simpleCMSComponent = cmsComponentService.getSimpleCMSComponent(uid);
        final AbstractPageModel page = getAvailableComponentsPage();
        final ContentSlotModel bodySlot = getBodySlot(page);

        addComponents(bodySlot, Collections.singletonList(simpleCMSComponent));

        storeCmsPageInModel(model, page);
        return getViewForPage(page);
    }

    private AbstractPageModel getAvailableComponentsPage() throws CMSItemNotFoundException
    {
        return getContentPageForLabelOrId("availableComponents");
    }

    private ContentSlotModel getBodySlot(final AbstractPageModel page) throws CMSItemNotFoundException
    {
        return getCmsPageService().getContentSlotForPage(page, "BodySection").getContentSlot();
    }

    private void addComponents(final ContentSlotModel slot, final List availableComponents)
    {
        slot.setCmsComponents(availableComponents);
        modelService.save(slot);
    }
}
The JSP file for this controller is simple:
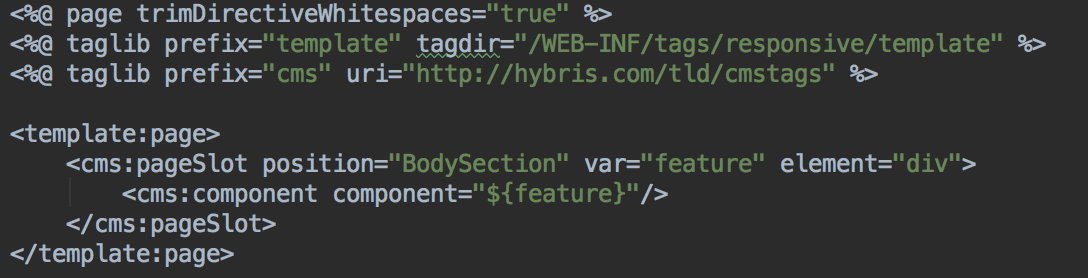
You need to apply the impexes for this page:
INSERT_UPDATE ContentPage; $contentCV[unique = true]; uid[unique = true]; name; masterTemplate(uid, $contentCV); label; label; defaultPage[default = 'true']; approvalStatus(code)[default = 'approved']; homepage[default = 'false']
; ; availableComponents ; Available Components Page ; AvailableComponentsPageTemplate ; availableComponents ; available-components

INSERT_UPDATE ContentSlot; $contentCV[unique = true]; uid[unique = true]; name; active; cmsComponents(&componentRef)
; ; AvailableComponentsBodySlot ; AvailableComponents Body Slot ; true ;

INSERT_UPDATE ContentSlotForPage; $contentCV[unique = true]; uid[unique = true]; position[unique = true]; page(uid, $contentCV)[unique = true][default = 'availableComponents']; contentSlot(uid, $contentCV)[unique = true]
; ; BodySection-AvailableComponents ; BodySection ; ; AvailableComponentsBodySlot
As a result, you will be able to render the component in isolation. Create a URL for each component, and you will get a list for the screenshotting engine.
In my case, the scripts created the following structure:
screenshots_20180325_140000/
├── cmspages/
│   ├── desktop/
│   │   └── DE/
│   │       ├── EN/
│   │       │   ├── company/
│   │       │   │   ├── about-us.html
│   │       │   │   └── images/
│   │       │   │       └── about-us.png
│   │       │   ├── our-products.html
│   │       │   └── images/
│   │       │       └── our-products.png
│   │       └── DE/
│   │           ├── company/
│   │           │   ├── about-us.html
│   │           │   └── images/
│   │           │       └── about-us.png
│   │           ├── our-products.html
│   │           └── images/
│   │               └── our-products.png
│   └── mobile/
│       └── DE/
│           └── EN/
│               └── …
└── components/
    └── desktop/
        └── DE/
            ├── EN/
            │   ├── AboutCompanySimpleParagraphComponent.html
            │   ├── OurProductsParagraphComponent.html
            │   └── images/
            │       ├── AboutCompanySimpleParagraphComponent.png
            │       └── OurProductsParagraphComponent.png
            └── DE/
                └── …
Comparing the screenshot with the previous state of the page
Each page and each component has its own page and a separate screenshot image file. It is enough for a manual check, but when you have hundreds of pages, and many language and country versions of the pages, it is not a solution. You need to track the changes automatically.
I use ImageMagick for this purpose. For each image file, my script finds a counterpart in the folder created at the previous run and compares the files using the ImageMagick compare tool:
compare -metric AE $CURDIR/$TARGET/$file1 $CURDIR/$TARGET/$file2 $CURDIR/$TARGET/$fileHowever, this tool requires the images to have the same dimensions. If your component or page was changed, the size will be different. You need to resize the images to the dimensions of the larger image.
$CURDIR/makeSameSizeImages.sh $CURDIR/$SOURCE1/$file $CURDIR/$SOURCE2/$file $CURDIR/$TARGET/$file1 $CURDIR/$TARGET/$file2I used bash for the makeSameSizeImages.sh script. It was not the best solution, but a quick one that works.
#!/bin/bash

SIZE=`identify $1 | cut -d " " -f 3`
WIDTH1=`echo $SIZE | perl -npe "s/^(.*?)x(.*?)$/\1/g"`
HEIGHT1=`echo $SIZE | perl -npe "s/^(.*?)x(.*?)$/\2/g"`

SIZE=`identify $2 | cut -d " " -f 3`
WIDTH2=`echo $SIZE | perl -npe "s/^(.*?)x(.*?)$/\1/g"`
HEIGHT2=`echo $SIZE | perl -npe "s/^(.*?)x(.*?)$/\2/g"`

MAX=$WIDTH2

if [ $WIDTH1 -gt $WIDTH2 ];
then
    MAX=$WIDTH1
fi

if [ $WIDTH2 -gt $WIDTH1 ];
then
    MAX=$WIDTH2
fi

MAXWIDTH=$MAX

MAX=$HEIGHT2

if [ $HEIGHT1 -gt $HEIGHT2 ];
then
    MAX=$HEIGHT1
fi

if [ $HEIGHT2 -gt $HEIGHT1 ];
then
    MAX=$HEIGHT2
fi

MAXHEIGHT=$MAX

echo "[RESIZE] width=" $WIDTH1 $WIDTH2
echo "[RESIZE] height=" $HEIGHT1 $HEIGHT2
echo "[RESIZE] max = " $MAXWIDTH $MAXHEIGHT

if [ "$WIDTH1 x $HEIGHT1" != "$MAXWIDTH x $MAXHEIGHT" ];
then
    echo "first image should be resized";
    convert -resize ${MAXWIDTH}x${MAXHEIGHT} -extent ${MAXWIDTH}x${MAXHEIGHT} -gravity northwest $1 $3
else
    cp $1 $3
fi

if [ "$WIDTH2 x $HEIGHT2" != "$MAXWIDTH x $MAXHEIGHT" ];
then
    echo "second image should be resized";
    convert -resize ${MAXWIDTH}x${MAXHEIGHT} -extent ${MAXWIDTH}x${MAXHEIGHT} -gravity northwest $2 $4
else
    cp $2 $4
fi
Having two same-size screenshots of the same page created by the same tool with the same browser, we can assume that the result of comparing them will be absolutely predictable — no differences if no changes were made to the components of these pages.
However, the Chrome rendering engine does not create absolutely identical screenshots even if all components are identical. Unfortunately, there is no pixel-wise accuracy for the images. Look at the banners in the right column. The system thought that they were slightly different, but they were not.
These images look identical:
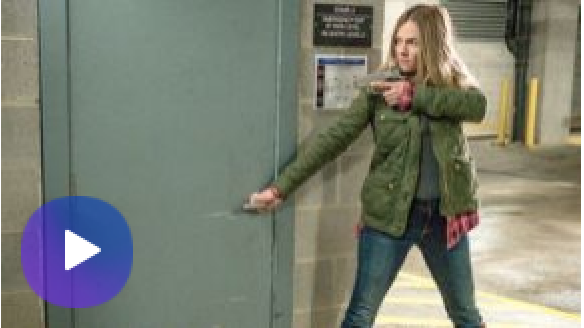
and
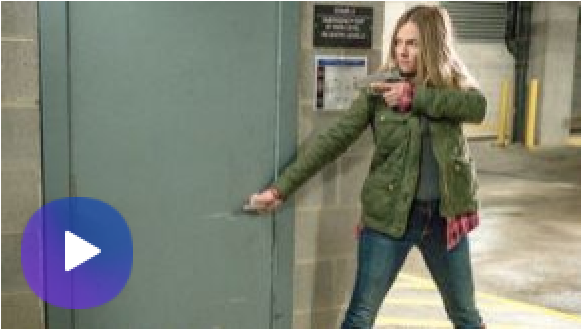
But the image comparison shows that there is a difference in the icon:
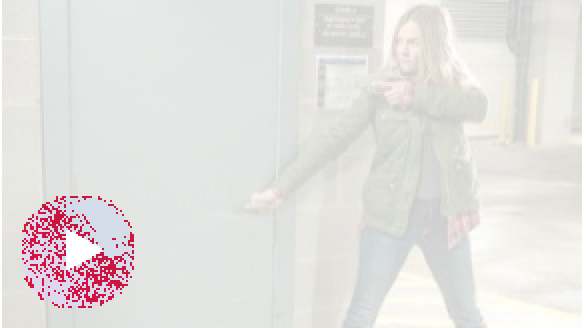
This icon is added as a vector image on top of the raster image, and Chrome turns antialiasing on, which is a bit random.
We need to ignore these changes by adding:
-fuzz 5%as a parameter:
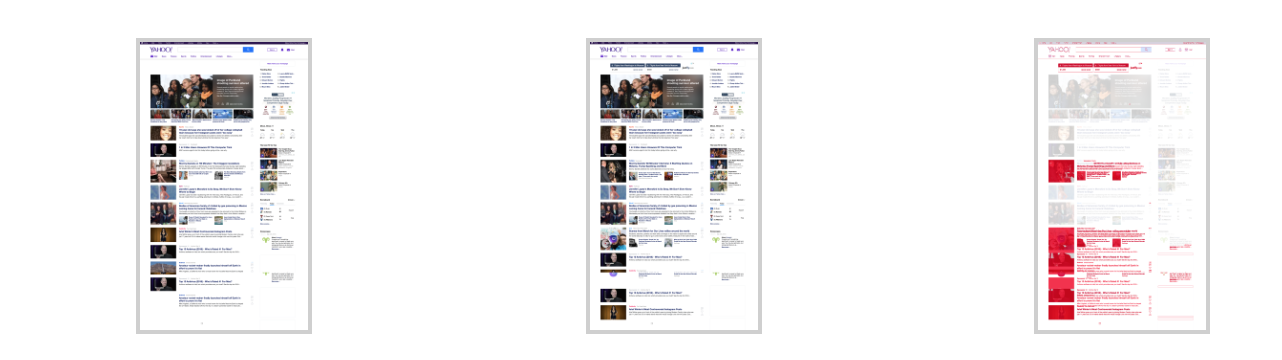
You can see that the banners are not marked as different anymore.
That is why I compare component pages, not only whole pages. Components, such as banners in this case or news feeds, are compared separately by being placed on the page in isolation from other components.
You can see that the bottom part is marked in red:

This is because our HTML works with relative positioning rather than absolute positioning of objects. One change in the middle of the list, and all items of this list below the item will be considered different, while they are just shifted. Comparing components rather than pages makes the situation easier to resolve.
Technologies and tools used
- Python 3
- Selenium Server 3.7.1
- Chromedriver 2.33
- Bash
- ImageMagick 6.7
Discussion
Powered by GitHub Discussions — sign in with a GitHub account to join the conversation.