Crop & resize in Product Cockpit 2.0: A bridge over the Impossible
 |
This article is brought by Tetiana Antonenko, EPAM Java developer |
 We decided to chose the topic Rauf explained in this blog before, “Crop and resize in Product Cockpit“, and extended it with new features. Even though the idea and title were not new, our vision on the implementation and user interface was completely different and seemed very challenging. Eventually we won the contest!
[Scroll to the end of the article to see a demonstration]
Crop and resize module: The what, why and how
The target is to resize and crop images to a given size directly in hybris Product Cockpit. With this extension, you no longer need to resize and crop each image by hand using such tools as Photoshop or Gimp; image renditions will be generated on-the-fly based on the transformation rules managed by the administrators.The way things are in hybris
There are different image types in the product data in Hybris, to name a few:- Thumbnail type, for search results and category pages
- Normal/picture type, for the product page, as the main picture
- Detailed type, for pop-up gallery pages and other needs
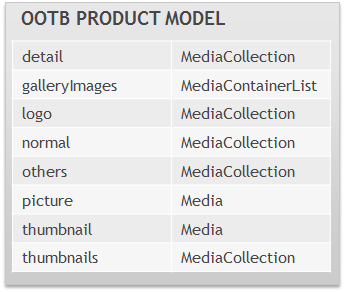 Hybris expects that all uploaded images have
- Right format (JPG/GIF/PNG)
- Right proportions/ image size
- Autocorrected
- Already web-optimized
Why it is not good?
Thumbnails
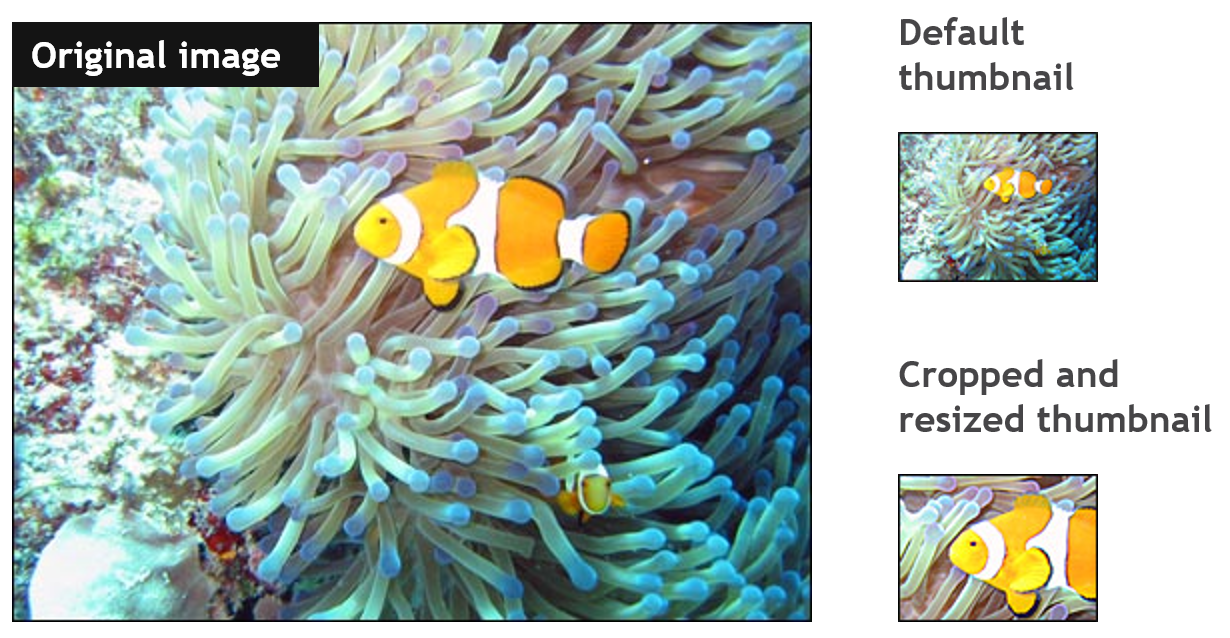
Thumbnails are not simply downscaled versions of the full size image. Displaying a significant part of the picture instead of the full frame can allow the use of a smaller thumbnail while maintaining recognizability. For example, when thumbnailing a full-body portrait of a person, it may be better to show the face slightly reduced than an indistinct figure.Product Page Images
Product page images are commonly similar in terms of proportions what might not be true for the detailed images of the same products. Sometimes we need to have different product page templates for different types of products to present the products better:
Breakpoints
If you want to use different images for different devices/resolutions and make your website responsive, you need to standartize the resolutions.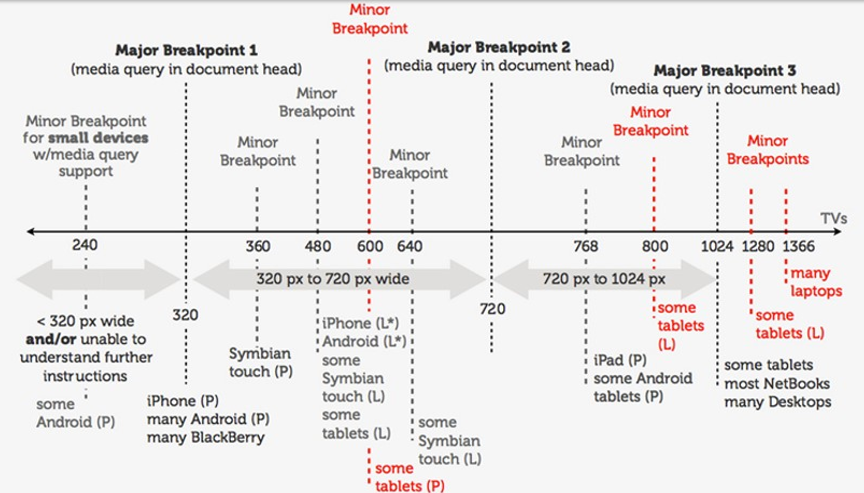
Browser scaling: easy-to-miss errors
Different images need different rendering/scaling algorithms. Below you can see that crisp edges works better for some images (checkers as an example), while real life images require another scaling algorithm to look better in a different size.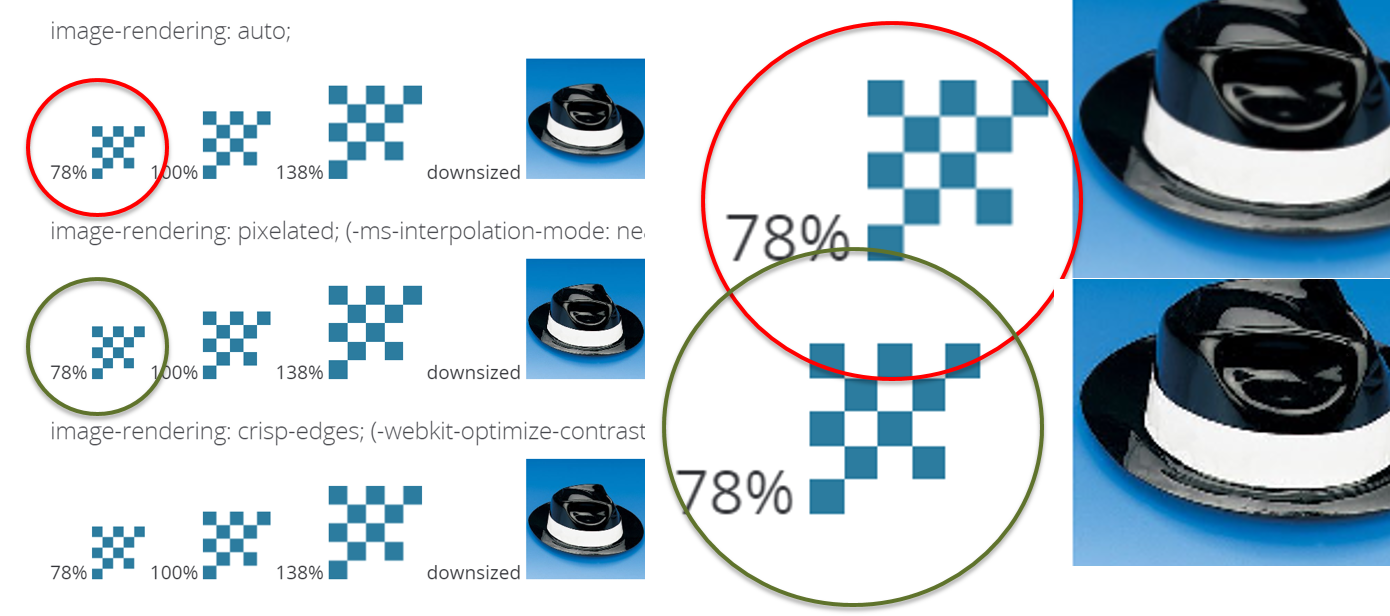
Manual solution ? – yes!
Cropping and resizing an image is easy in any image editor. Where it becomes tedious though, is when you have to repeat this process for dozens or hundreds of images. Think: open the image in Photoshop, crop it, create a thumbnail, save it and repeat for each of your images. And if the result is not good, you have to do it all over again. One could define a macro to do it quickly, but unfortunately every image has to cropped in another area, which is why this process can only be done by hand. We propose a totally different approach, allowing you to set a cropping area in seconds and to redefine it if you don’t like it.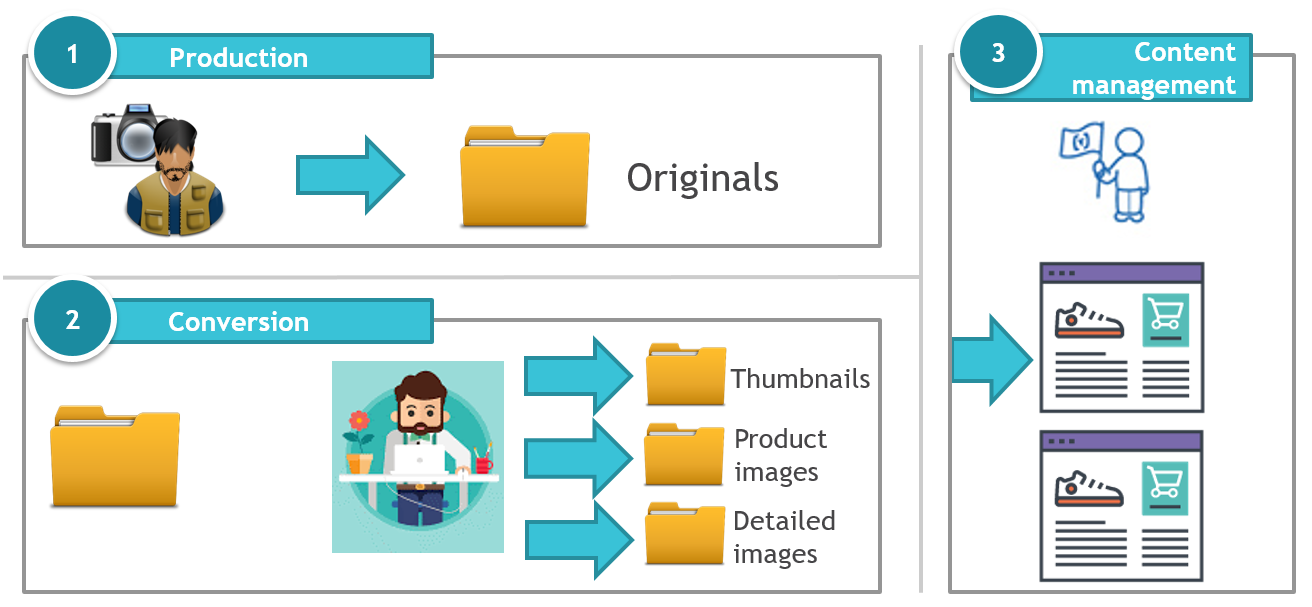
hybris OOTB automation?
In the default hybris package, the automatic image resize functionality is provided by Mediaconversion. The module has some severe limitations that make it hardly suitable for most of the projects. To name a few:- MAJOR: MediaConversion module is not integrated into Product Cockpit.
- MAJOR: No cropping feature in MediaConversion.
- MAJOR: OOTB MediaConversion module is not interactive.
- minor: OOTB MediaConversion module uses the 3rd party tool, imageMagick.
Our solution
Interactive cropping tool. The cropping area is configurable for each cropping group.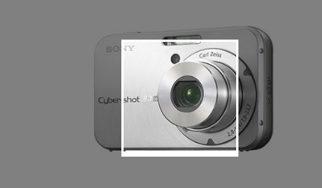 Configurable. You can specify one or more source fields and one or more target fields, as well as the conversion rules and parameters. Data-driven: all configuration is in the database.
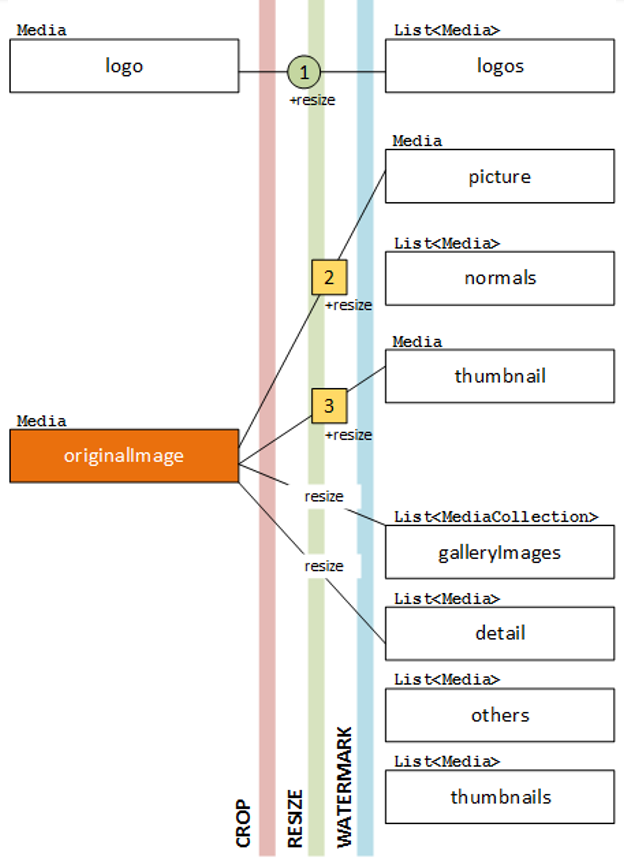 one target field can have more than one source field.
- This pattern can be used for applying different types of renditions for the same target field. For example, different watermarks* for the same field.
- This pattern can be used if you have one master image and a number of renditions (thumbnail, product page image, detailed image) of different proportions.
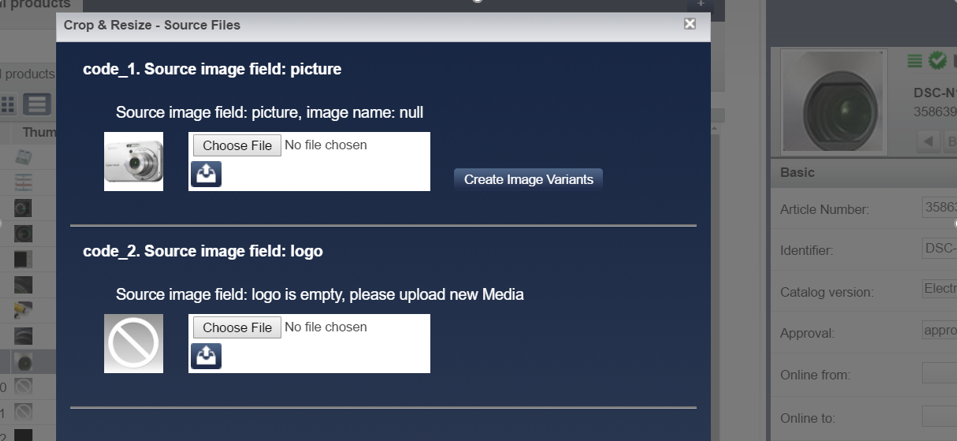 The system supports one or more source images. For example, administrator can upload one image for thumbnail and another image for the product page. After that the administrator will be asked to crop the images. The cropped and resized versions of these images will be saved into designated product attributes (configurable for each source image)
Ready to grow
At the moment the module is configured for crop&resize only. However, the data model and some components are ready for the next steps, Watermarking, rotate and flip images.

Data model
In the diagram below you can see a simplified data model for the extension.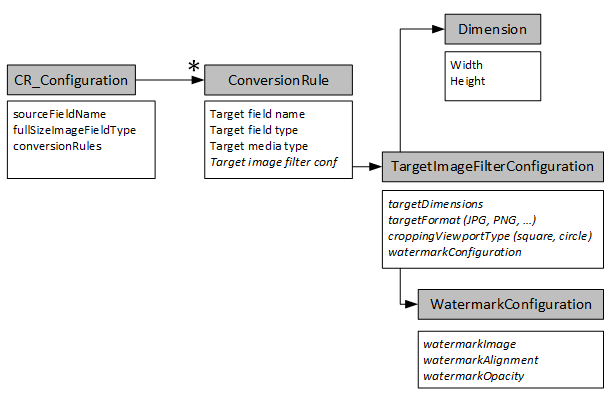
- CR_Configuration defines a configuration for each source image configuration. The configuration consists of conversion rules.
- Conversion Rule defines a conversion parameters for each target field. Conversion Rule refers to the TargetImageFilterConfiguration..
- TargetImageFilterConfiguration defines a image-specific parameters, such as dimensions, formats, cropping shapes etc.
User Interface
The launcher is integrated into Product Cockpit Editor area.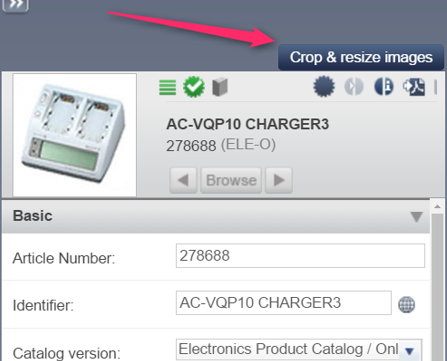 The configuration says that imageOriginals1 and imageOriginals2 contain source images. You can create renditions separately for each source field or for all fields in one go.
“Create image variants” launches a cropping images window. Once the cropping is done, the downscaled and cropped version of the images are saved into the target product attributes.
Challenges and technical details
GetMediaModelFromCurrentProduct
protected Optional<MediaModel> getMediaModelFromCurrentProduct(String sourceFieldName) {
ObjectValueContainer.ObjectValueHolder value = UISessionUtils.getCurrentSession().getCurrentPerspective().getEditorArea().getEditorAreaController()
.getModel().getCurrentObjectValues()
.getValue(UISessionUtils.getCurrentSession().getTypeService().getPropertyDescriptor("Product." + sourceFieldName), null);
if (value.getCurrentValue() instanceof TypedObject) {
return Optional.ofNullable((MediaModel) ((TypedObject) value.getCurrentValue()).getObject());
}
List currentValues = (List) value.getCurrentValue();
return currentValues.stream().findAny();
}
Uploading an image by product attribute name
For uploading we used Fileupload.class For saving the results we used:modelService.setAttributeValue(productModel, targetAttributeName, imageMediaModel);
Image Crop interface
Integrating third party javascript libraries into hybris cockpit was one of the challenges in the project. We used jquery.js and croppie.js for the pop up window. These libraries are completely incompatible with the old version (3.6.4) of ZK Framework. In addition to that hybris doesn’t allow to add/replace javascript libraries without touching the platform code. Certainly, the solution is IFRAMEs.Window window = (Window) Executions.createComponents("/cropandresize/interactiveCropWindow.zul", null, params);
...
<strong>interactiveCropWindow</strong>.<strong>zul</strong>
<?xml version="1.0" encoding="UTF-8"?>
<?variable-resolver class="org.zkoss.zkplus.spring.DelegatingVariableResolver" ?>
<?taglib uri="http://www.zkoss.org/dsp/web/core" prefix="c"?>
<zk xmlns:h="http://www.w3.org/1999/xhtml" xmlns:zk="http://www.zkoss.org/2005/zk">
<window title="Image Crop" border="normal" id="win">
<button onClick="wizardBean.doResizeAndSave(createCroppedImageEventListener);win.detach();" label="Close Window" visible="false" />
<iframe id="iframe" width="100%" height="100%" src="/../cropandresize/doCrop?${arg.pathUrl}">
</iframe>
</window>
</zk>

Matthias Heid
22 March 2017 at 08:52
Great job.
Try to port it to backoffice if feasible, 6.4 release will bring a totally new PCM experience